Pipeline Set Up
A pipeline is where you can track all candidates through the hiring process. Each column in the Kanban-style pipeline represents a different stage. Pipelines are created and configured on the organization level and assigned to a position in the position details. This topic addresses how an administrator creates and configures pipelines. For information about assigning a pipeline to a position, please see Creating and Configuring a New Position.
Accessing Pipeline Set Up
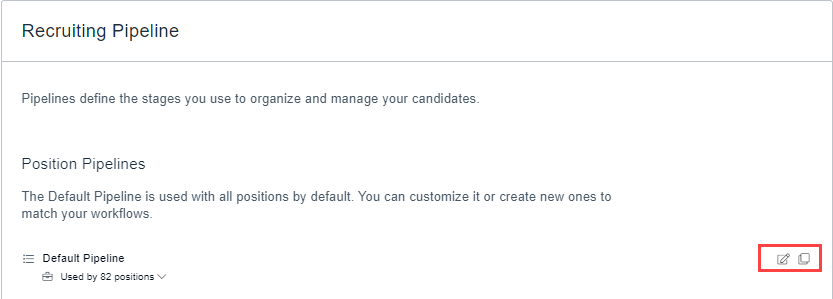
You can access pipelines in your Recruiting Preferences.
- Click the gear ⚙️in the left sidebar.
- Hover over Recruiting Preferences.
- Click Pipeline Stages.
Editing or Deleting an Existing Pipeline
- To edit a pipeline, click the edit button
 next to the appropriate item.
 - To delete a pipeline, click the X next to the appropriate item.

Creating a New Pipeline
To create a new pipeline:
- Click +Position Pipeline.
- Enter a name in the Pipeline Name field.
- Add stages and configure the stage actions as appropriate.
Managing Stage Actions
Stage actions automate the repetitive actions you take each time a candidate moves to a certain stage, like sending a thank you email after a candidate applies, or asking your hiring team to give feedback after an interview. The stage actions available to you (and the options associated with them) may vary, depending on the integrations that have been enabled on your account. Some common stage actions include:
- Send Email/SMS: Choose a message template to send to a candidate and determine when the message will be sent. Note that this action only occurs if a candidate's email address (or mobile number) is available.
- Send Questionnaire: Choose a questionnaire to send to a candidate and decide if you would like to delay sending.
- Send Assessment: Choose an assessment to send to a candidate, and decide which stage to move them to after the assessment is complete.
- Team Feedback: Send an email to each member of the hiring team, requesting their feedback on the candidate.
- Candidate Scorecards: Assign a task to each member of the hiring team, to complete the scorecard for the candidate.
- Assign Hiring Manager: Choose a hiring manager to assign the candidate to, or to rotate assignments within the hiring team.
- Run Background Check: Run a background check on the candidate. Note that you must have a background check integration enabled.
- Background Check Result: Choose which stage to move the candidate after their background check is complete, depending on whether they pass or fail.
To manage stage actions:
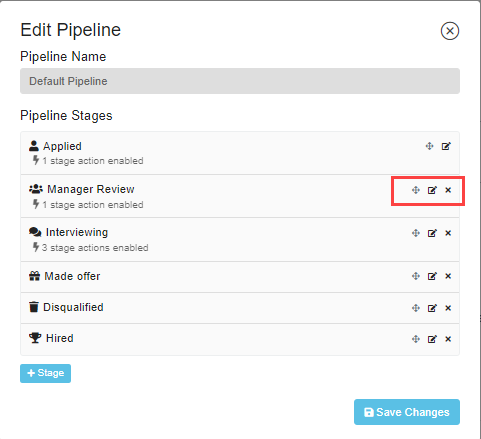
- Add a stage using the +Stage button or find the stage where you would like to set the action and click the edit button
 on the right-hand side.
 - Click the drop-down field for Available Stage Actions and select the correct action.
- Click +Add next to the name of the stage action. The newest action will be added to the list of Configured Stage Actions.
- Choose options for the stage action.
- Click Save Changes.

Limiting View of a Pipeline Stage to a Hiring Manager
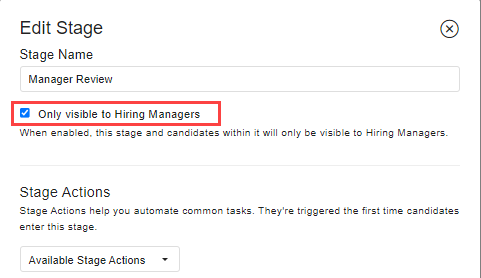
If you have a step in your hiring process that only pertains to certain members of your team, you can limit its visibility to hiring managers.
- Locate the appropriate pipeline and click the edit button
 on the right-hand side.
 - Find the stage you would like to change and click the edit button
 on the right-hand side.
 - Click the check box next to Only visible to Hiring Managers.

