Creating and Configuring a New Position
Successful hiring begins with creating a position with thorough details for both candidates and the hiring team.
Create the Position and Enter the Main Details
 Video: Create the Position and Configure the Main Details
Click here to view the video full screen.
Details
The Details page contains the main information for the position. Here, you specify position details such as position title, department, location, position type (full-time, part-time, etc.) and salary.
- Click Positions/Pools in the left sidebar.
- Click +Add Position in the top-right corner.
- Complete the fields on the Details page as appropriate. Position Title, Location and Position Type are required standard fields. Your organization may also use position custom fields to gather additional information that is not captured by the standard fields. If so, those will be displayed at the bottom of the page. Position custom fields may or may not be required, depending on how they are set up. All required fields are marked with an asterisk *.
- Click the Next Step button to save the information and move to the next page.
Add a Job Description
 Video: Adding a Position Job Description
Click here to view the video full screen.
Details
On the Description page, you will add a detailed job description for the position. There are several options for entering a job description. The content can be manually typed or pasted into the text area. Alternatively, you can select a job description template. Selecting a template automatically populates the text area with content from the template.
PeopleFluent Recruiting provides several standard job descriptions. In addition, your company may use position templates, which are custom job descriptions that are specific to your organization.
- Type or paste the job description content into the text area, or select a job description template from the Find a job description... field. You can filter the available templates by Custom Descriptions or System Descriptions.
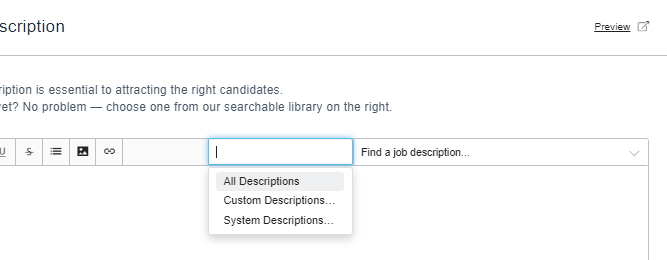
- Edit and format the text as necessary. Several formatting options are available using the tools located above the text area. You can change the heading style, the font style (bold, italicize, underline, strike through) and the list style. You can also include images and URL links. If you are using a template, you can still make text and formatting changes. The updates will apply to the current position only. No changes will be saved to the template.
- Click the Next Step button to save the information and move to the next page.
Set Up the Application Form
 Video: Setting up the Application Form
Click here to view the video full screen.
Details
On the Application Form page, you configure how and where candidates can access position postings, and what information to collect from them.
- In the Career Sites field, select a career portal. This is the career portal where the job opening will be posted.
- In the Candidate Applications section, choose how candidates can apply to the position.
- Enabled: Select this option to post the job on the selected public career site and make it available to publish on third-party job boards.
- Internal Only: Select this option to limit the posting to applicants from your employee portal.
- Unlisted: Select this option to allow only applicants with the defined URL link to apply.
- Disabled: Select this option to keep the position private. The position will not be listed, but applicants can be added manually.
- If you choose Enabled, Internal Only or Unlisted, you can customize which fields applicants will be able to see on the application form. This is done in the Application Form section of the page. You can choose to make each field optional, required or disabled altogether. Use the toggle buttons to update the default status of each field (Name and Email Address will always be required).
- In the Questionnaire section, you can add a questionnaire to the application to gather additional information from your candidates. There are two options:
- Select an existing questionnaire from the drop-down field.
- Users with the appropriate permissions can create a new questionnaire specifically for the job posting. Click the +Add a Questionnaire button. For additional information about creating questionnaires, please see Questionnaire Set Up.
- The questionnaire will automatically be appended to a candidate's experience unless you clear the Include in Candidate Experience (Default) check box.
- In the Compliance section, configure compliance requirements for the position.
- Equal Employment Opportunity Commission (EEOC) compliance is included in the application process by default. To remove this, click the Disabled button.
- To require General Data Protection Regulation (GDPR) consent, click the Required button.
- In the Apply Via Email section, note the displayed email address. This can be used by hiring managers to allow candidates to apply directly by email. When an application sends an email to that address, a candidate profile is created for this position. Note: This method is not recommended if you are using custom questions on the application form, since those questions cannot be displayed to the applicant.
- Click Next Step.
Set Up the Position Pipeline
 Video: Managing the Position Pipeline
Click here to view the video full screen.
Details
A position pipeline defines the stages used to organize, track and manage candidates for a position. Each stage in the pipeline can contain one or more "stage actions", which are actions that are triggered automatically when an applicant enters a stage. For example, you may want to send an email automatically when a candidate applies.
- On the Pipeline page, select a pipeline from the drop-down field.
- Stages cannot be added or removed, but hiring managers and company admins can edit or add stage actions to the existing stages. Within a stage, click Add Stage Actions or Edit Stage Actions to add or update the associated actions.
- Click Next Step.
Configure Candidate Scoring
 Video: Managing Candidate Scoring for a Position
Click here to view the video full screen.
Details
Candidate scoring can be an important part of the hiring process. Scoring options for a position are managed on the Candidate Scoring page. There are two aspects of candidate scoring. Scorecards provide a set of key candidate elements, allowing the hiring team to provide a score for each of these elements. Match Scoring lets you assign weight to a set of categories related to the position. It helps you save time by allowing PeopleFluent's AI to scan your candidate resumes to determine how much of a fit they are for your position.
Assign a Scorecard
You have the option to assign an organization scorecard, or to create and assign a scorecard that is specific to the position. Scorecards are managed in the Available Scorecards section of the page.
- To select an organization scorecard, select an option from the drop-down field.
- To create a new scorecard, click the +Add Scorecard button and configure the scoring elements.
Manage Match Scoring
Match Score categories include such things as skill level, education, management experience, etc. You can manage the weight of each category in the Match Score section of the page.
- Match Scoring is optional, but enabled by default. To turn it off, click the Disabled button.

- To adjust the weight for each category, use to track bar to increase or decrease the importance.
Set Up the Hiring Team
 Video: Managing the Position Hiring Team
Click here to view the video full screen.
Details
Each position is assigned a unique hiring team. These are users who are involved with the hiring process for the position in some way. On the Hiring Team page, you can add and remove users, and assign each user a role in the hiring process. By default, the user who created the position will be designated as the hiring manager. This can be updated later.
Assign Individual Users to the Hiring Team
You can assign users one-by-one to the position hiring team.
- In the Choose User or Team field, select a user from the drop-down field.
- Select an option in the Choose a Role field to assign that role to the user.
- Click the +Add button. The user displays in the Individual Users section.
Assign a Pre-Configured Hiring Team
Your organization may have pre-configured hiring teams. These are teams that are created and managed by a company admin in the Company Settings, that can then be selected and assigned to a position. Assigning a team will automatically assign everyone in the team to the position.
You will follow the same steps to add a hiring team as you do to add a user, but will select a team in the Choose a User or Team field. The role you select in the Choose a Role field will be assigned to all users on the team, but roles can be updated later.
Note: Currently, you cannot delete users individually who were added with a hiring team. You must delete the entire hiring team from the Teams section.
Changing Hiring Team Roles
You can update the role for each user on the hiring team.
- In the Individual Users section, click the user's associated role.
- Select the new role.

Adding External Recruiters
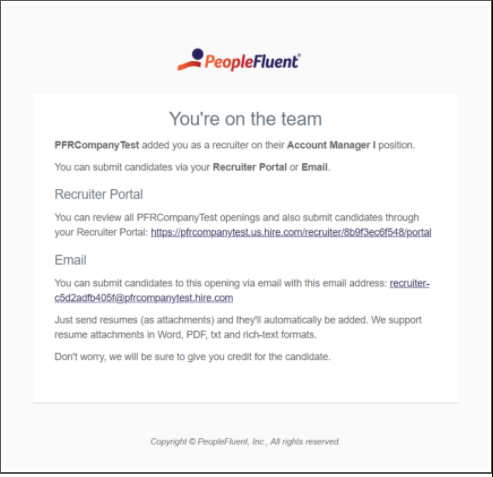
You can add third-party recruiters to your hiring team in the External Recruiters section. We'll email your recruiters and share all the details they will need to add candidates to the position.
- Enter the first and last name in the Recruiter Name field.
- Enter the email in the Email Address field.
- Click the +Add Recruiter button.
Repeat this process for each recruiter. Added recruiters will get a message similar to the one below.
Select the Approval Workflow
Your organization may require that the position go through approval workflow before it can be activated. When this is the case, the Approvals page is included in position set up.
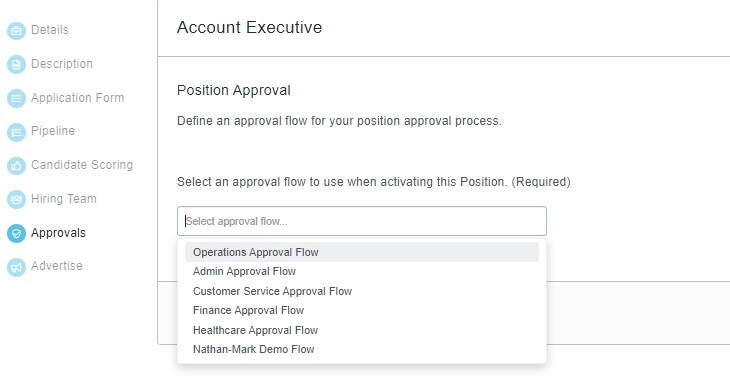
The default workflow is selected automatically. If there are multiple workflows available, you can select a different option.
- On the Approvals page, select an option from the workflow options.
- Click Next Step to save the information and move to the next page.
Manage Position Advertising
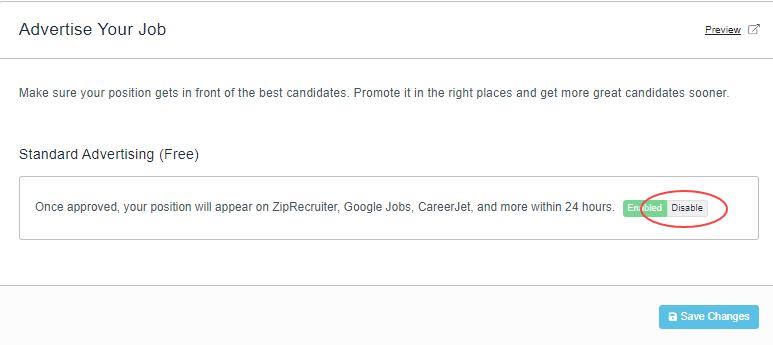
By default, the position is enabled to be posted to Google Jobs, Career Jet and additional free job boards once it is approved. You can turn this off on the Advertise page by clicking the Disable button.
 e Position
Activate the Position
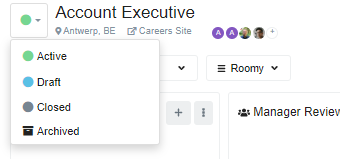
If you save a position as a draft, you can activate it later from the pipeline view. Just look for the status drop-down field, which shows a colored dot. Active positions have a green dot and draft positions have a blue dot.
Request Position Approval
If your organization requires approval to activate a position, the Approval Request window displays when you select Activate in the step above.
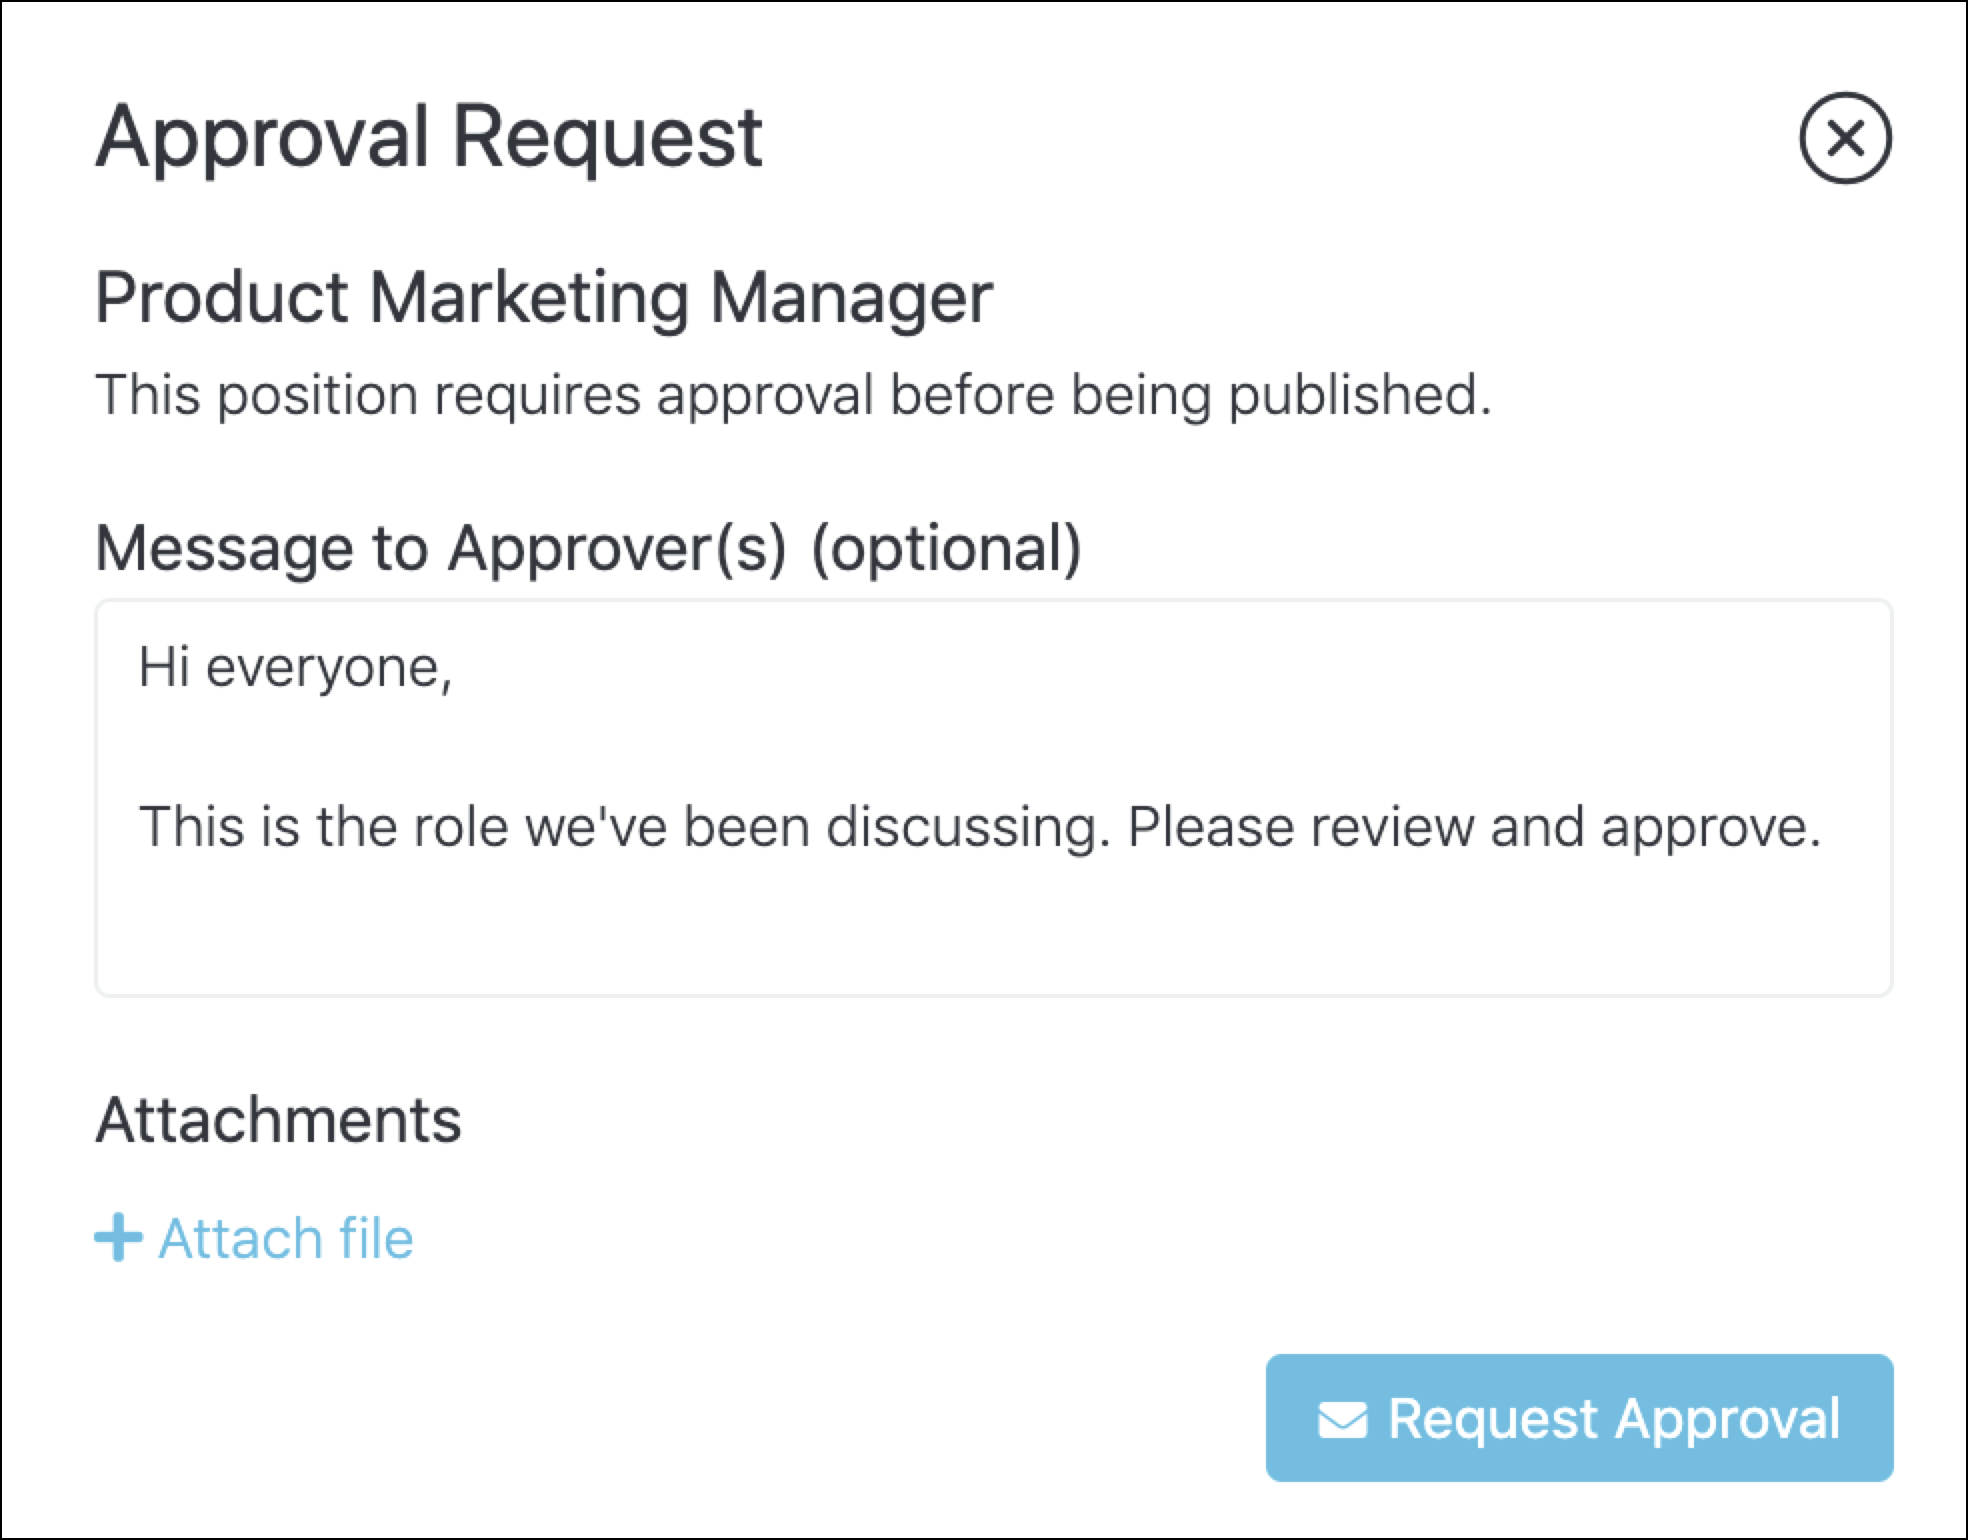
You have the option to include a message and attachments to the approval request. Click the Request Approval button. The position will be routed through the approval workflow that you selected on the Approvals page.
Below is an example of the message that approvers will receive:
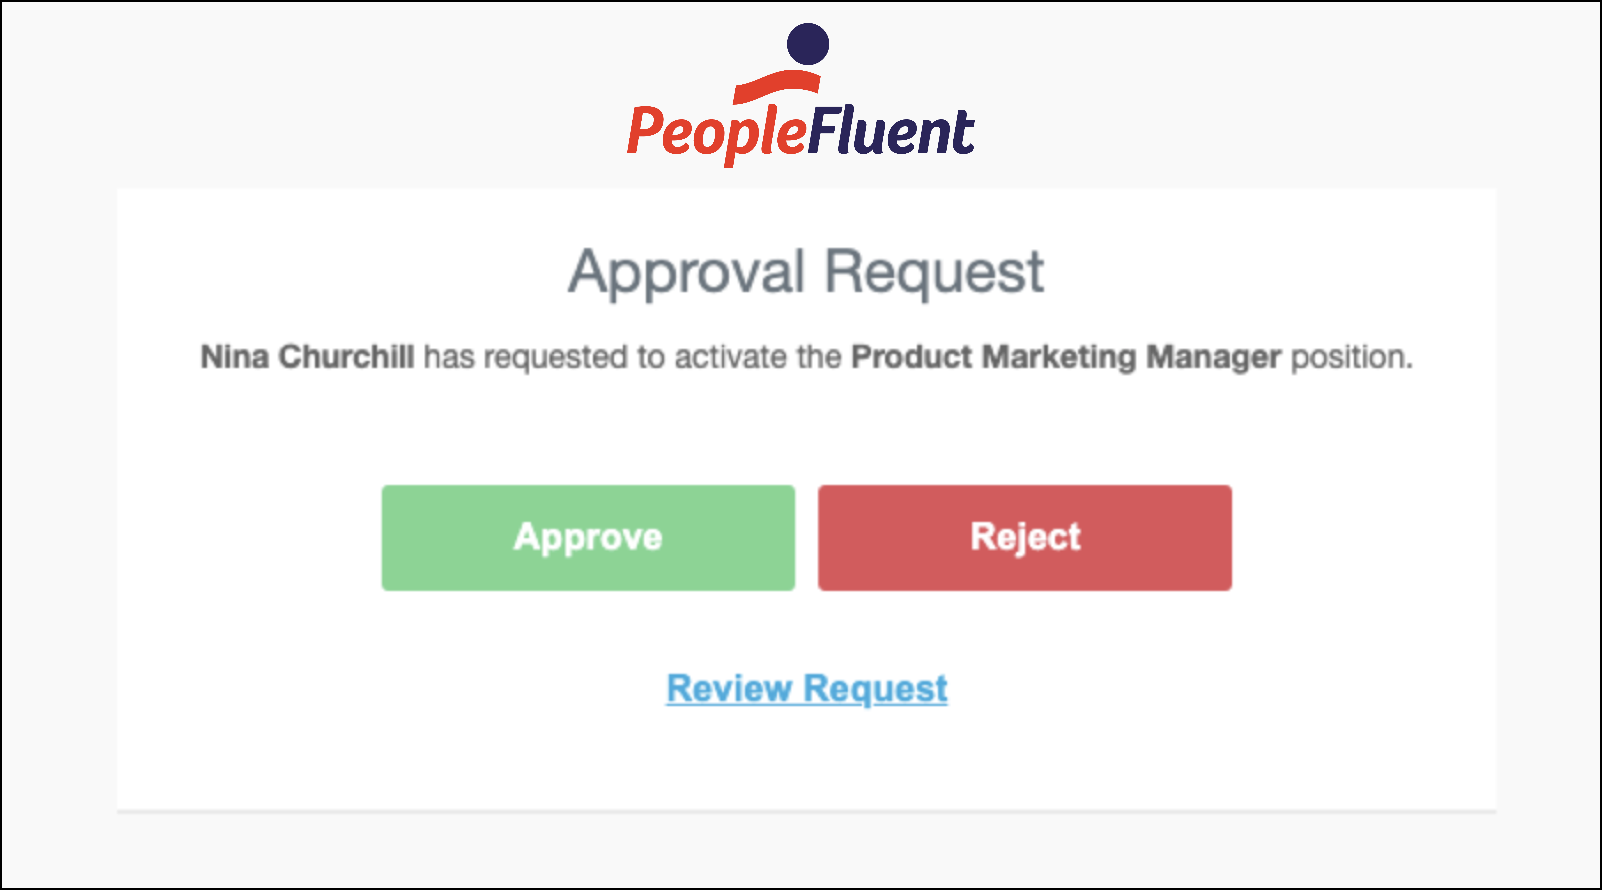
If your workflow requires approval from any company admin, every administrator on your account will receive a request for approval simultaneously. If your workflow has an approval chain, the first person in the chain will receive the request. Once that person has approved, the next person in line will receive the request and so on, until everyone in the chain has approved.
Until the position has been fully approved, its status will show a yellow dot to indicate that it's pending approval. You can cancel the request from the status drop-down field at any time, which will return the position to a draft status (with a blue dot).
