System-Wide Scheduling Links
With scheduling links, you can define your team's availability and create interview time slots for candidates. Then, share a unique scheduling link via email or text and let the candidate pick the best time for them. Single-use scheduling links are often created during meeting set up, but administrators can configure system-wide scheduling links that are available to all positions and hiring managers.
For information about setting up single-use scheduling links, please see Using Scheduling Links to Set Up an Interview.
Accessing System-Wide Scheduling Link Set Up
- Click the gear ⚙️ in the left sidebar.
- Hover over Recruiting Preferences.
- Click Scheduling Links.
Editing or Deleting an Existing Scheduling Link
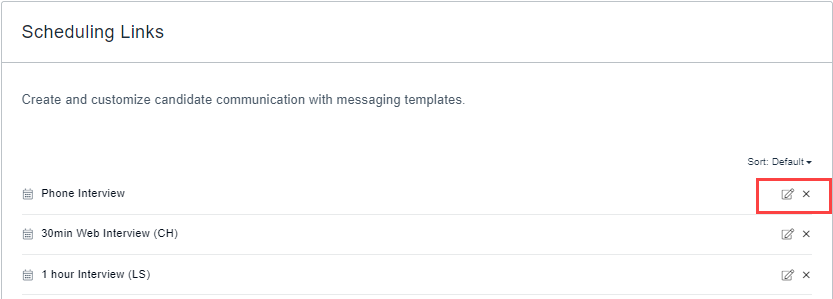
- To edit a scheduling link, click the edit button
 next to the appropriate link.
 - To delete a scheduling link, click the X next to the appropriate link.

Creating a New Scheduling Link
- Click + Scheduling Link.
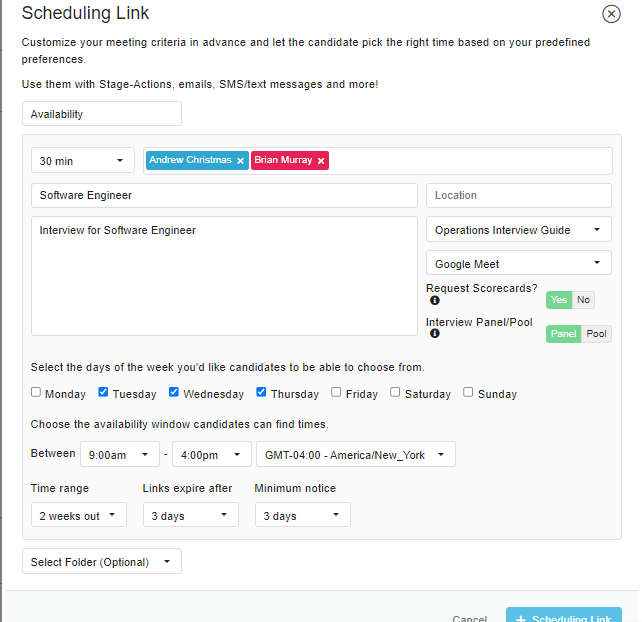
- Configure the scheduling link:
- Link Name: Enter a name for the scheduling link.
- Duration: Select a duration for the interview (30 min, 1 hr, etc.)
- Interviewers: Select the interviewers. Click in the field to display all available interviewers.
- Interview Title and Description: Enter a title and description for the interview in the appropriate fields.
- Location: Enter a location description in the field (Onsite, Video, etc.)
- Interview Guide: If your organization has created interview guides, you can select one of them in this field to associate with the interview.
- Video Interview: To schedule the interview as a live video meeting, select an option in this field.
- Request Scorecards?: Select Yes to request scorecards from the interview team following the interview.
- Interview Pool/Panel: Select an option in this field. Pool schedules a meeting with a single interviewer from a pool of available interviewers. Panel schedules a meeting with a group of interviewers.
- Date, time and expiration details: Configure the day of the week and time options for the candidates to be able to choose from. Provide a time-frame range and expiration for the link.
- If you would like to store the scheduling link in a specific folder, choose an option in the Select Folder field. See Creating a Scheduling Link Folder for information on adding folders.
- Click + Scheduling Link.

Creating a Scheduling Link Folder
- Click +Folder.
- Enter a name for the folder in the Folder Name field.
- Click the +Folder button.
